Wednesday, January 30, 2008

Big Fat Bio Hazard

Warning * Warning * Warning * Will Robinson !
Bio Wall Blunder !

Bye Bye Bio wall.
You have beaten me down.

I was warned by a nay sayer that the bio wall would turn into a bio hazard .
Now I have to admit he was right.

It’s just not working.

The cuttings that I took back in late October to early November have not created sufficient roots to hold a soil mass together.
When I turn the flats up on edge at a 10 degree angle the whole flat of succulents crumbles into a blob of soil, tiny white filaments of roots and big green leafy plant heads.


I am disappointed to say the least.

After the flats kept falling face first onto the ground I cut up some chicken wire and stapled it to the frame and stuffed the succulents into the chicken wire frame. Sort of like how they make those succulent wreaths, but only way way larger.

Yes it did work but it is incredibly labor intensive and I don’t think the three bio wall sections would make the trip from my house to the Cow palace in decent shape.
I think it will really look like a bio hazard site once it arrives at the Cow palace and that is not a chance I want to take.

There is not enough good tough mature fibrous root mass to keep its shape.

So now onto Plan B.

When I figure out what that will be I’ll let you know.

Saturday, January 26, 2008

Like a rolling stone

The talented crew put in another day at the studio .
Today they worked on the “L” shaped Venetian plaster wall with the Thai pebble inset panel.


After today I suppose I should stop calling it the Venetian plaster wall because I have decided to use a completely different product .
We’ll be using a product called American Clay
The look is the same when burnished and hand waxed but the content of the materials that is mixed together is very different.
In Venetian plaster we use a special type of hydraulic lime.
With the American Clay mixture there is no lime included in the mix.

I like that this product is eco friendly but the price was a bit out of my range, even with my contractor discount.
To cover a mere 140 square feet it cost $ 230 in raw materials alone, and I didn’t even purchase the special milk glue.

That is a pretty penny for such a small area.
I don’t think we will be veneering the planter box walls with the same product.
I think we will go with regular tinted stucco .

Below are the two inset panels for the shower wall.
We are using a hand carved stone tile that I purchased in Bali last year to set into one of the wall panels.


The other panel will have the shower head, which is ‘ huge’ ! ( guess all this rainy weather is getting to me ! )

Friday, January 25, 2008

Stoners and Flamers

No, it wasn't a gay pot smoking party.
It was just another day at the office.

It poured like the dickens today so the guys were pulled off a project that we have been building in Northern California and came down to “le studio” to work inside on the landscape show project.

Today they built the walls for the small water feature.

First they had to gingerly tilt up the tempered glass mosaic wall that I had crafted along with the two side wall panels.

In the photo below you can see the two red tempered glass mosaic panels standing upright. The big 5 foot wide by 7 foot tall main glass panel is propped up behind them.
You can barely make out the 2x4 stud wall structure that makes up the backside of the glass mosaic wall.


Also in the photo above you can see the guys starting to build the frame for the small stone water feature.
Miguel and Andreas are building the plywood frame that the stone will be glued to and Palamino and Galdino are cutting stone.

As I mentioned in my opening sentence, the weather was wet rainy and fowl. The stone was soaked from both the wet saw cutting and the rainy ride down from Santa Rosa.
So Adreas ( FLame Boy ! ) used the handy dandy little torch to dry the stone out so we could mastic it onto the plywood

Flame Boy Flame on !


This next photo show the stone being glued onto the plywood


One finished side - Note the finger joints on the far side.

A close up of the stone panel - 2 feet high and 3 feet wide.
The yellow chip up in the left hand corner is the Venetian Plaster color chip .
( it looks really washed out in this photo )
Our small water feature will butt up against one side of a Venetian plaster wall.


So that was pretty much the day.

Thursday, January 24, 2008

Garden Show Update -Jan. 24 .- Weighty Issues

Some “weighty” decisions had to be made in regards to the upcoming show.

When I say weighty I mean as in: “man that weighs too much , we have to reengineer !“

The planter boxes , of which there are approx. 64 lineal feet at 20 inches high are now going to be constructed out of light weight sheet styrofoam and covered with tomato soup orange eco-stucco ( # 2 from photo ).
We’ll use the commonly found insulation sheets of styrofoam - probably the 3/4 inch
sheets.


The small square water feature that abuts the venetian plaster ( warm mustard yellow ) will be crafted out of thin strips of slate stacked one on top of the other . ( # 4 from photo )

The bio wall is still being experimented with, but we’ve concluded that it will have to be built and transported in several different sections and then re-bolted together at the show.
I am hoping that we can avoid small ‘gaps’ in the segmented sections.
We also cut down on the height of the wall.
It was going to be 3 flats high with a top planting of bromeliads which would bring the over all height to over five feet tall, and instead have decided plant the wall 2.5 flats tall and top it off with about 1 to 1.5 feet tall of bromeliads and orchids.
This new revision will allow people who don’t want to wait in a ( inevitable ) line to view the garden from standing outside of the exhibit ( It is a ‘walk -through’ , handicapped access display)

Bio wall individual flats - 3 high


Bio wall indvidual flats - photo shows 2 flats high - we’re going 2.5 high


Aeoniums and other succulents growing in pots . These will be planted infront of the bamboo planter and infill the bio wall.


The shower wall still has to be built using standard construction techniques due to the extremely heavy weight of the stacked Thai pebbles.
Each 2 foot by 6 foot insert panel will weight several hundred pounds so the framework really needs to be beefy to accommodate both the weight and the thickness of the stones.
( # 5 + 6 from photo )

Back to the studio !
That’s the update for now.
Michelle

Friday, January 18, 2008

Garden Show Update - Jan. 18 - Plumbing Matters

You got questions, They got answers - The Urban Farmer Store


Yesterday I received an e-mail from the fine folks at the Concrete Works Studio.
They are graciously supplying the hand crafted concrete soaking tub that is the crown jewel of our display garden.
Some of the final specification details still had to be worked out such as designing a custom made pallet that the tub can be transported on and moved into place , without it actually having to be taken off the pallet.

Sounds simple enough huh ?

Well in theory it is , but we have to plumb this baby and it is not a typical plumbing situation that one would find in a residential set up.

So off to my water feature and irrigation gurus : The Urban Farmer Store in Mill Valley


As I walked in and looked down the isle of plumbing components I started to get blurry eyed.
Where the heck to begin !


Enter the Pond Plumbing and Irrigation Angel :
She’s a regular blond female ‘McGiver’. Talk about brains and beauty.


In a matter of a half hour or so she figured out gasket and flange size, reducer and expander connections, L’s, T;s and cross your I’s ! Not to metion correct nipple size.
( yeah, we had fun with that one ! )

Then enter the other half of the dream team.
Eric and JT wanted to see their engineering mathematics in action so they did a test run using a 950 gallons per hour pump and connected it all to the water weir.


Lights, camera , ACTION ! It worked !


The engineering master mind and expert irrigation guru at his mad scientist work bench putting all the pieces together .
In the foreground, on the table, is the actual flange , gasket, and L connection assembly that will be installed at the bottom of the tub .


Last photo :
The water weir .
It has built in LED lights in the water reservoir.
You can order it Urban Farmer Store.
As the water cascades out from the weir the sheet of water is illuminated.

Cool !


You got pond or irrigation questions ? The Urban Farmer Store team has answers and action !
Thanks guys and gals.

Monday, January 14, 2008

Garden Show Update - Jan. 14 - after the grout

Lots of Grout and quite a few beers too ......

We had absolutely beautiful weather this past weekend.
It was crystal clear blue skies and a lovely day time temperature of 65 degrees.

Great for gardening work, which I did none of .
Great for enjoying a couple of nice dark English beers, which I did a lot of.
But also great for working on the glass mosaic project with both garage doors wide opened to the beautiful weather
“The Wall “ ( and yes, I did play Pink Floyd music , The Wall , while grouting the hours away) was completed this weekend.
I still have the two small side walls to build, paint, epoxy , scrape, but I can do that during the evening hours this week and have them ready to grout by next weekend.

The most labor intensive part of the project so far is the scraping off of the epoxy that inevitably gets smooshed onto the face of the glass.

You have to let it dry to just the right consistency so that it is not gooey but just hard.
But not so had that it can chip out the glass if you scrape it with a little too much pressure.

This picture below shows me removing some of the excess grout - note the ever present dust and fume mask.


A close up of the cleaning process.
You can see the area that I am working on has the thin skin of grout covering the glass removed ( the yellowish area ) and the area out at the edges still is drying and has not been rubbed clean.


Almost done. You can see some hazy areas and some touch up areas.


All done. - The grout towads the outer edges hasn’t cured out to its final color, (it becomes a bit more orange chocolate rather than just dog poop brown.
You can see the razor blade scraper, which was my constant companion for at least 8 hours during the scrape off the epoxy phase , and the glass/ grout buffer.


Now down to Home Cheapo to purchase some 2x4’s to build the two side wall frames and purchase a sheet of Hardie Backer Board.
I have enough paints to complete the side walls but need to get more tempered glass and more sparkle paper and glitter.

Off to the store !

Next project will either be making the Buddha head light box that fits into the center of the hole in the glass moasic wall and connecting in the water weir.

Or it could possible be starting on the Venetian plaster shower walls with the Balinese / Thai pebble inset.

Who knows ? - Depends on when certain materials arrive by mail.

See you around the studio !

Michelle

Wednesday, January 9, 2008

San Francisco Garden Show Update

Call me crazy or just plain foolish , but I am going to be participating in the 2008 San Francisco Garden Show as a design exhibitor.

The theme of my display/show garden is somewhat of a personal story that started last year during my surgical recovery phase from partial lung removal surgery.
After my surgery I spent a fair amount of time homebound and in my back yard garden ( attached to an oxygen machine ).
During those long contemplative days I was eternally thankful that I had previously created a sanctuary ambience in my garden to recover in.
As much as it may sound like a cliché', I truly felt that there was a definite healing power being in my garden.

So I have designed a simple sanctuary style healing garden that is somewhat ethno-modern in style for the upcoming 2008 San Francisco Garden show..
It includes a comfortable place to take a nap ( I did a lot of that while recovering ) a place for yoga, an outdoor hot water soaking tub , an outdoor shower and the garden is fairly low in maintenance but yet has enough color and textural foliage to make you feel as though you are truly in a garden.

Below are a couple of sketches and some elements of the garden that I have been working on.
The show is coming up rather quickly so a lot of fabrication will be taking place in my studio ( aka the garage ) over the next 2 months so I'll be pretty busy.

If you are in my neighborhood , feel free to give a call and come on by and check out our progress .
If you can’t stop by in person please check this blog to keep an eye on the various elements we’ll be prefabricating for the show.

Happy Gardening,
Michelle

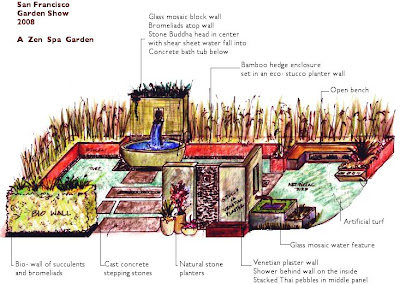
This perspective plan shows the basic design premise though the color scheme has changed a bit.


This is the simplified site plan - Size of the garden is 16 x 32 feet


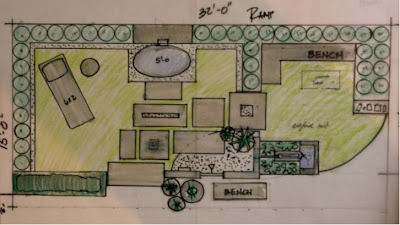
There are several unique features in the garden.
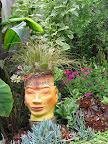
The most colorful and stunning will be the tub area.
Standing behind the cast concrete tub by Concrete Works Studio will be a glass mosaic wall.
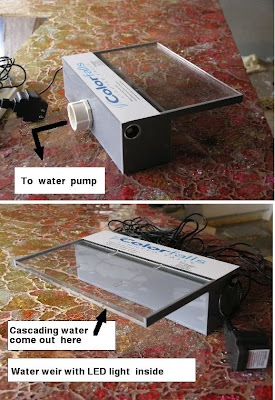
The glass wall will have a window cut out in the center . In the window will sit a Balinese stone Buddha head.
Spilling out from below the head will be a cascading sheet of water that spills into the cast concrete bath tub.

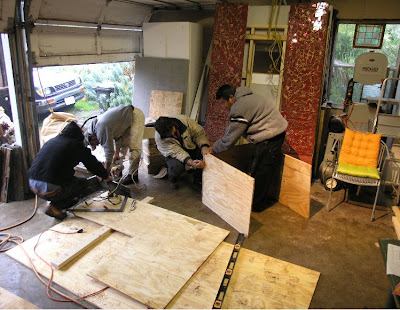
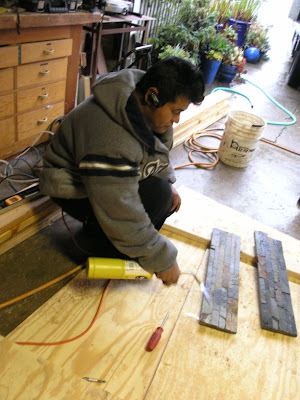
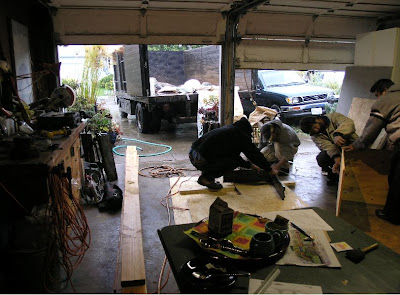
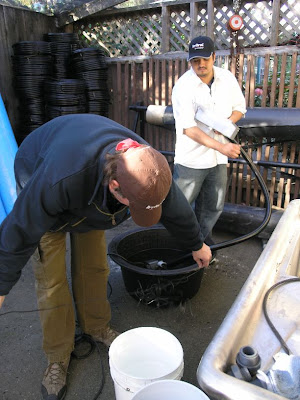
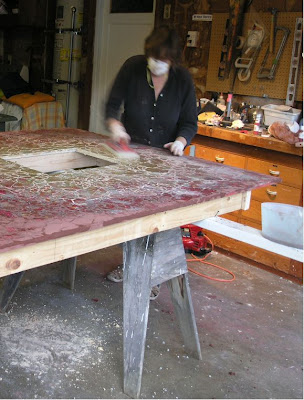
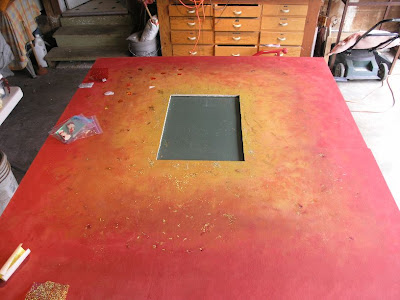
Here are a couple of progession photos of us building the glass mosaic wall in the garage along with a photo of the Concrete Works Studio bath tub ( photo taken at their studio workshop )
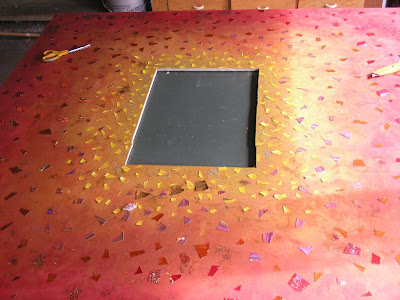
Picture 1-
This shows the Hardie Backer board being painted with water based paint


Picture 2-
The colored glitter paper being glued to the painted Hardie Board
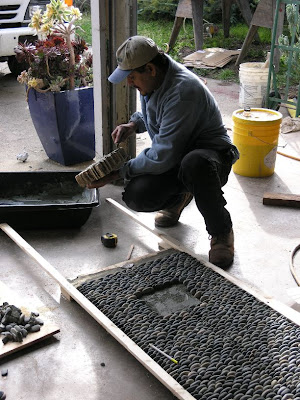
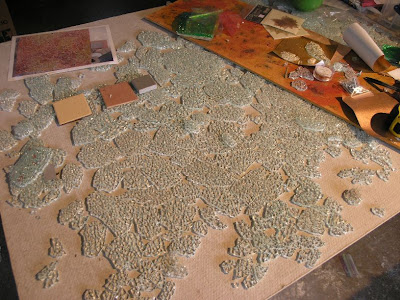

Picture 3 -
Lots of broken tempered glass getting ready to be epoxied onto the board


Picture 4-
Epoxy-ing the broken tempered glass onto the colored board in the garage studio
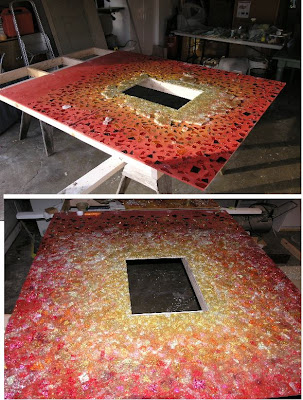
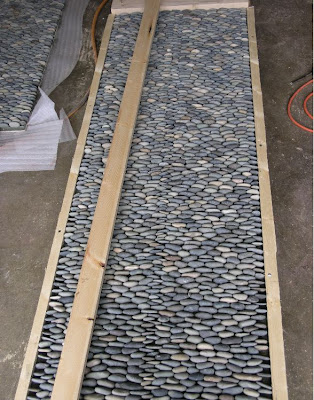
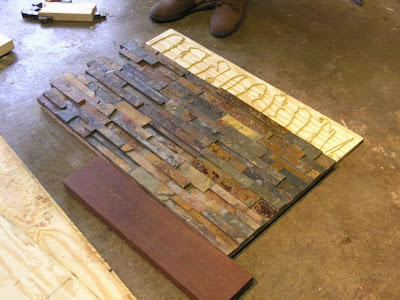
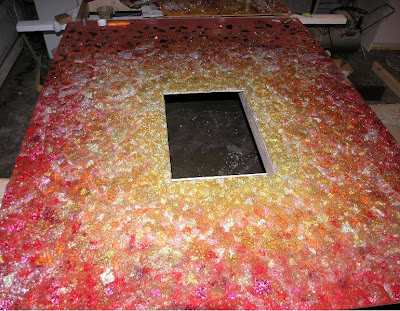

Picture 5-
Most of the glass is epoxied on.
Next step is to finish all of the glass work and then to grout the open areas between the glass fragments with colored grout.
I have purchased a yellow and a dark red grout and wll mix in a little bit of gold glitter into the grout for a sparkley effect.
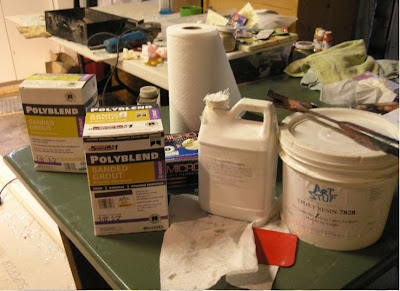

Picture 6 -
Shows the type of Epoxy and hardener that I used along with the grouts.


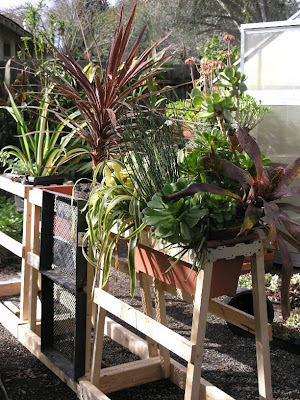
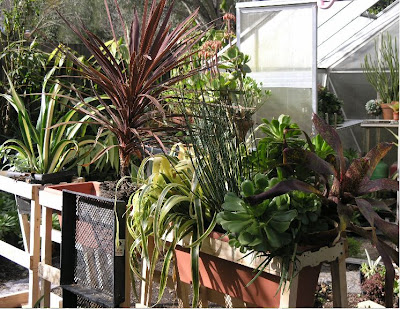
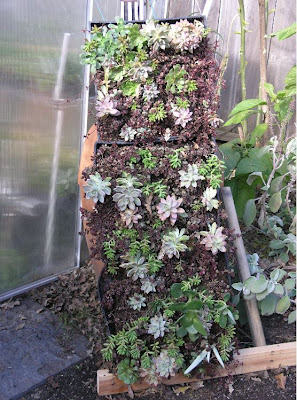
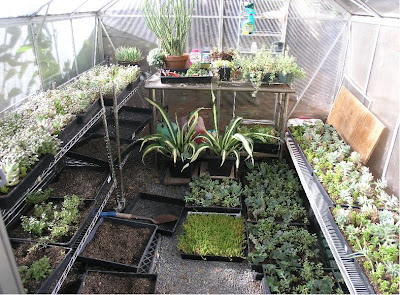
While the glass mosaic wall is being fabricated in the garage we have been busy propagating succulent in the greenhouse .
These flats of succulents will be used to build our Bio Wall wilth.

Picture 7 -
Succulents in the greenhouse
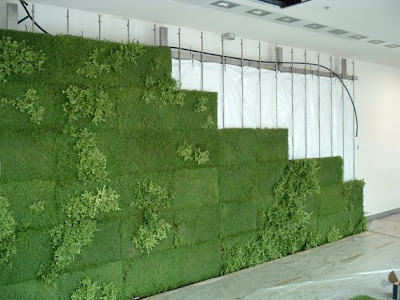

Picture 8 -
Our biowall will not be as large as the one I am posting below, but we will use the same
type of building methods.
And our bio wall will be planted with succulents and not grass.
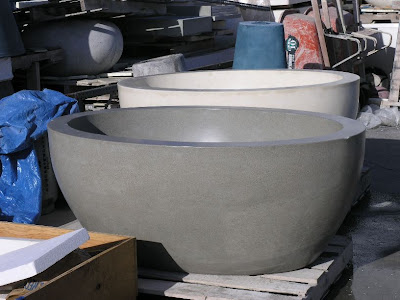

Picture 9 -
This is the cast concrete tub by ConcreteWorks Studio - It is 5 feet long and 25 inches tall
Photo taken at their fabrication studio


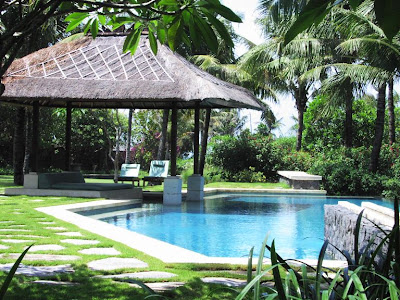
Enclosing our spa sanctuary garden will be a lush hedge of Bamboo provided by The Bamboo Sourcery in Sebastopol. - www.bamboosourcery.com
We chose this screening plant for its beauty and low maintenance characteristics.


Inside the bamboo screen room , on the back side of the Venetian plastered L shaped wall will be an outdoor shower set into a stacked pebbled wall.


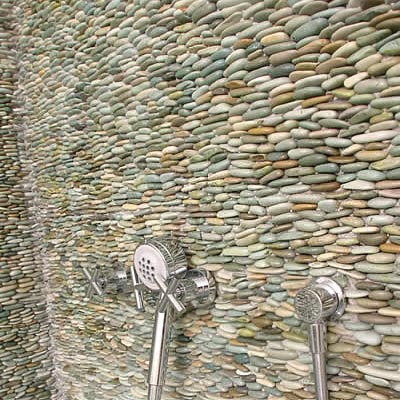
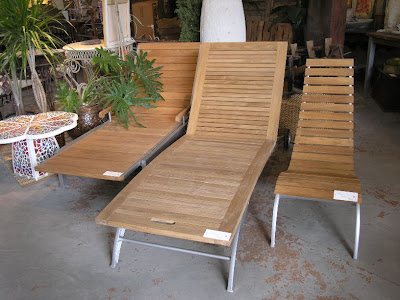
We will also have plenty of comfortable places to sit and relax while taking in the time to enjoy the surrounding artful ambiance.

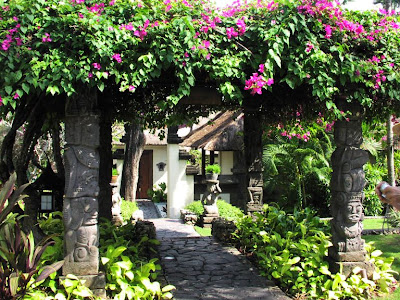
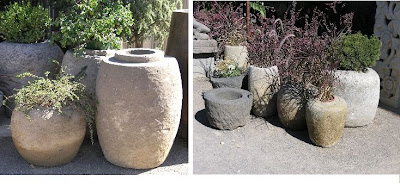
Chaise lounge and hand carved stone Balinese pots provided by Translations Imports located in Sonoma . www.translations-sonoma.com


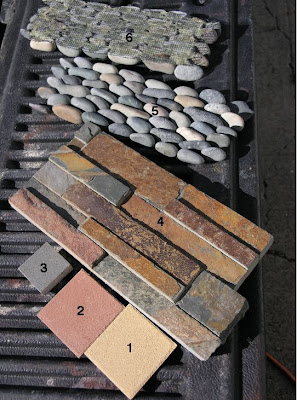
We’ve also paid attention to the small details, right down to the type of eco friendly replica turf provided by Foreverlawn.com and the hand crafted colored concrete and stone mosaic paving that our craftsmen will be fabricating


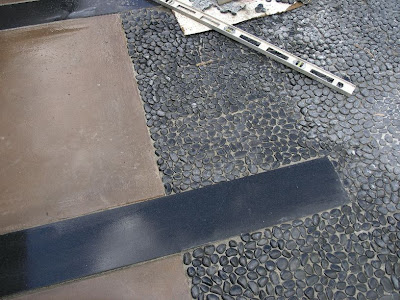
I’ll be posting more photogaphs as the various design elements are being built such as the stucco planter boxes, the venetian plaster shower and pebble walls, the stone mosaic stepping stones, the bio wall and the other water feature and benches.

So come on back and check out our progress and we hope to see you at the 2008 San Francisco Garden Show at the Cow Palace on March 12 thru the 16.

Happy Gardening !
Michelle

Wednesday, January 2, 2008

Arbors and Pergolas - Garden Blogger Design Workshop

Garden Blogger’s Design Workshop
ARBORS and PERGOLAS

Depicted below are a few of my favorite arbors and pergolas that we have designed and built for some of our clients.
I’ve also thrown in a few photographs taken while in Bali last year .
The pergola as we know it is called a ‘bale’ in Indonesia. ( pronounced bal-lay .)

This entry pergola was part of a full master plan that I worked on that included the landscape architecture and the design of the exterior architecture. The residence is located in a pristine oak forest in Carmel Valley CA.
The entry pergola is crafted out of wrought iron ( Aliano Ironworkers in Salinas CA ) and sits ontop of two cast concrete doric columns.

We also designed the matching hand rails.


This project located in Mill Valley Ca. was a real treat to work on.
We were given the opportunity to transform a plain plywood sheathed house into a home that had a decidedly California Craftsmanship flair to it.
New cedar shingles, new moulding around the windows and a new entry arbor helps give this flat faced facade some three dimesionality.


Blackburn looking down side view of entry pergola


This arbor constructed from redwood ( wooden cross beams ) and rigid polystyrene ( extruded doric columns ) sits out in the middle of the garden.
It acts as a hub. Go straight through the arbor and you will reach the vegetable garden , turn left under the arbor and you are lead down hill to the childrens play area, turn right and you traverse up a set of stone steps to the viewing garden ( San Francisco Bay views ) .


In Wine Country we were asked to design a set of arbors , a bocce ball court and a fairway/ soccer field.


This is a simple welded mesh wire arbor that I found at a local garden nursery.
It is located at the end of a driveway and marks the entrance to the back yard.


B A L I !
A bamboo covered walkway in a residential garden.


A typical ‘bale’ style pergola over a pool - private residence


bougainvillea covered pergola in bali - love the carvings on the posts !